It’s back again – by more popular demand. This series on How To Get The Lighting Right continues today with advice on how to light art. Now, before you get carried away, I’m not assuming you’ve all got a stockpile of Picassos and Monets that are looking a bit rubbish over the sofa, but it’s true to say that we spend an increasing amount of money on pictures, photographs and decorative features to put on the walls and yet we rarely, if ever, think about lighting them to their best advantage.
My guess is that you may have spent some time thinking about ambient lighting versus task lamps, but by the time you’ve got round to hanging the pictures on the wall, they’re not getting any special treatment. This is a mistake. Not only is failing to light your artwork like spending lots of money on a new dress and wearing it to the party with slippers, but it’s also a missed opportunity to create more of that so-called ambient lighting in the room.
Am I making sense? I thought so. Right come with me to find out about how to get the lighting right when it comes to your pictures then. This advice comes from Harry Triggs and Andrew Molyneux, founders of TM Lighting who are specialists in this field. And no, before you say anything, you don’t have to live in a gallery or a stately home to want (or need) to get this right.
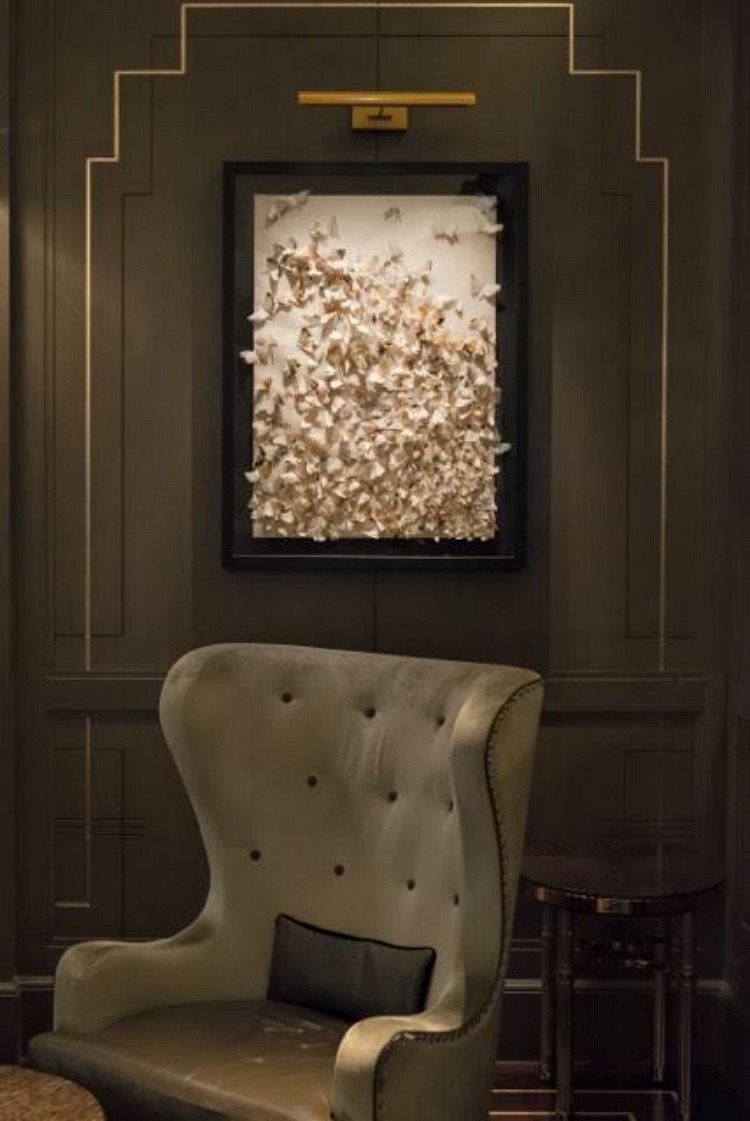
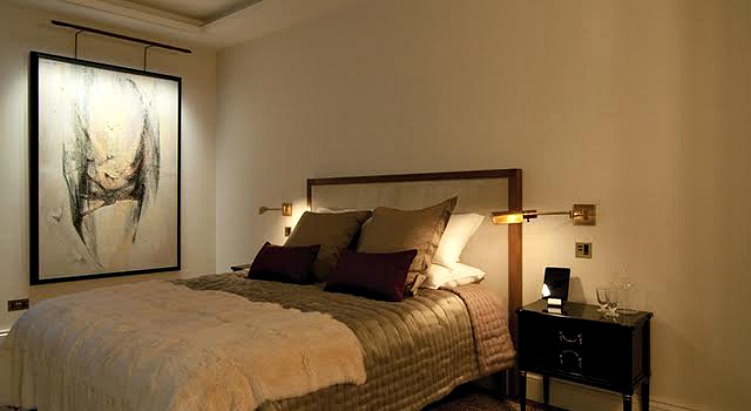
Andrew says: “Lighting the vertical surfaces – or what’s on the vertical surfaces – helps to define the size of the room as well as creating pockets of light that add drama. You can do this with wall lights but it’s more dramatic when lighting artwork, which will also create focal points within the room.”
Harry says: “Until the launch of our new range, high-grade lighting was often inaccessible for private homeowners as the sheer scale of the old technology wasn’t suitable for homes. Our products give museum-grade lighting which is an exciting development.”
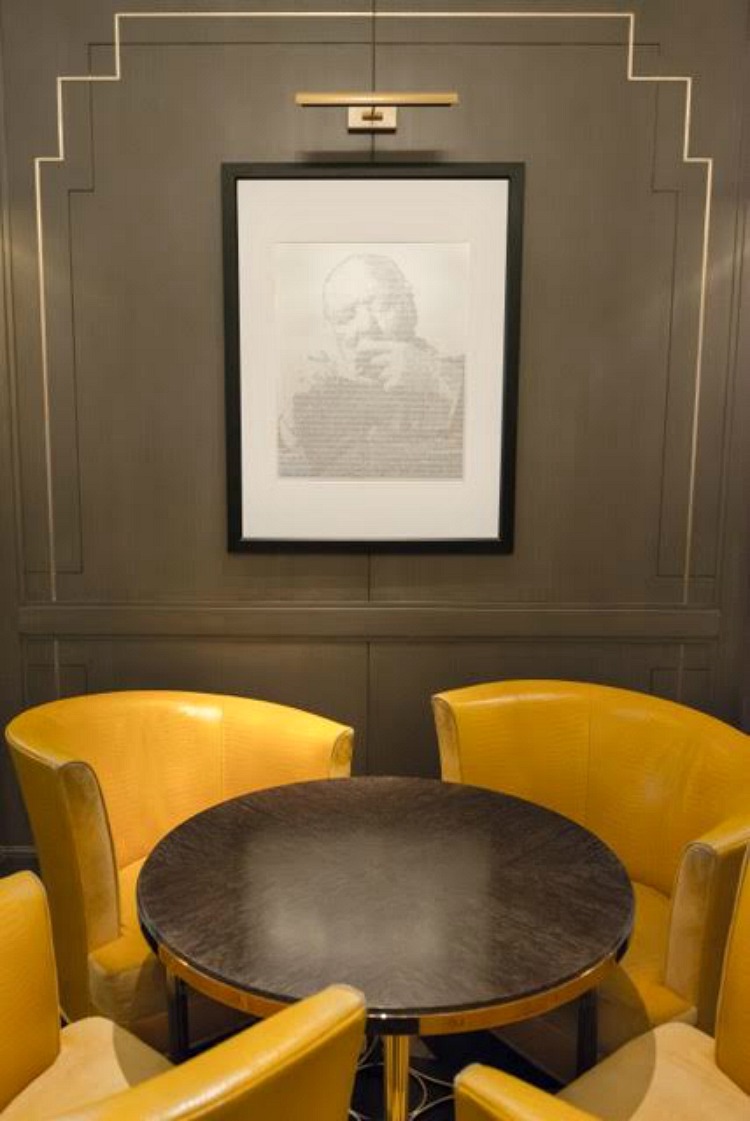
Their first tip is to visualise your room as a stage and choose a few pieces that you want to become focal points. They suggest illuminating just one piece and letting the light spill onto nearby objects. Or you can use accent lights to project a pool of light onto a group of artworks.
It is crucial to avoid hanging artwork in natural light, which is high in UV in the morning and high in infrared in the evening – both are damaging to delicate pigments. And, even if your art isn’t the sort that has delicate pigments, it will just gradually fade away to nothing.
If you are lucky enough to have two windows, then don’t hang anything between them as it will be difficult to see it properly with the light streaming in from either side. And if your art has been framed with reflective glass then you can’t put it opposite a window either or you won’t be able to see it.
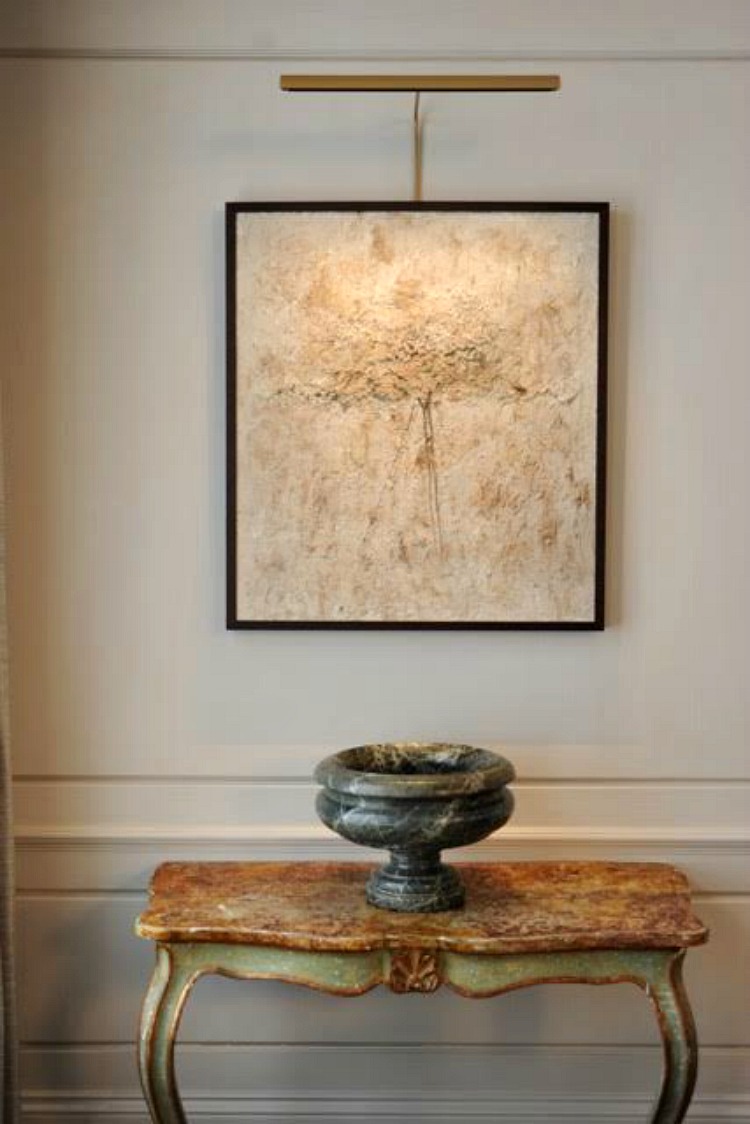
TM Lighting have a very cool slim picture light which is a million miles away from that fuddy duddy brass thing you’re thinking of right now…. it’s slim and sleek and, as well as coming in a variety of metallic finishes – including brass and pewter, you can also have it painted to match the colour of your walls so that it disappears completely leaving just the light over the picture. This would also give wonderful ambient light for the evening. You can always have a big pendant for the statement. Prices start at £216 (plus VAT) depending on the finish you want. If you don’t want it to match the walls then Harry suggests looking at door handles and other lights in the room to help you decide on the right finish.
The other key point is that it’s an LED; Halogen lights give out a lot of heat (as well as the aforementioned UV and infrared), whereas LEDs give better lighting and are more energy-efficient.
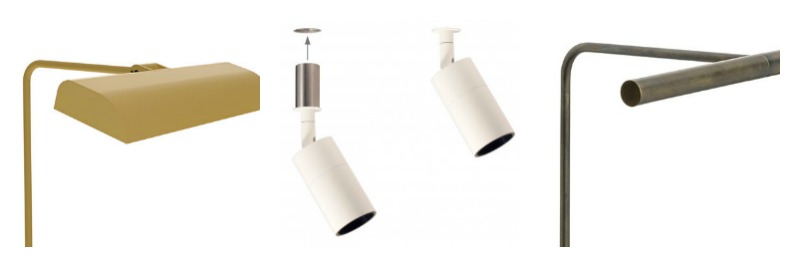
Another product, which the company has just launched is a spotlight that you plug into the ceiling which can then be moved around at will. The idea is that you install the fittings, which can then be filled with a banking plug so the hole (which is finger-sized) doesn’t show if you don’t need it, and you simply plug in the light, which angles, where you want it.
For the serious art collectors, this allows them to rotate their collection at will, hanging pictures of different shapes and sizes and ensuring there is always the perfect light. But actually, this could work for the rest of us. After all, we do move things around and add to collections so it’s a cool idea to be able to adjust the lighting accordingly.
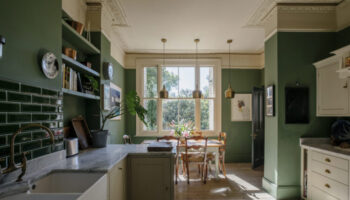
I also think you could use these in a kitchen as task lights and, you could move them to different places if you want to move the room around. It’s called the ArtPoint and has already won awards. It costs £168 and £45 for the recessed adaptor plate.
So now you know How to Get The Lighting Right in the kitchen, the bathroom, the bedroom and the sitting room as well as how to buy vintage lighting and how to light art. If you have any more questions on lighting let me know in the comments below and we’ll see if the series needs to continue.


My living room with existing mouldings and only two ceiling light sources isn’t high enough to envision a chandelier and too low to install recessed downlights (a problem anyway because of the mouldings) and I have not come across attractive exterior downlights. Any advice? Thanks Kate!
I’ve just had my whole house replastered and rewired , following my predecessor’s over enthusiasm for artex – yes it was everywhere. I also removed those awful brass picture lights you refer to above . And as I couldn’t find any nice replacements for them , my pictures will have to go up without lighting, alas. Any ideas on retro fitting!
If you have downlights you rec replace them with directional ones.
wonderful advice! thanks!