It has, as they say, been a minute since the last DIY post but we’re back and this time it’s tiling. So far we have looked at doing your own panelling and making your own lampshades and this week we’re looking tiles. This is one of the most common problems in rentals but also in owner-occupied homes. They’re messy and expensive to replace and, unless you’re very confident doing it yourself can be a daunting job when it comes to using tile cutters.
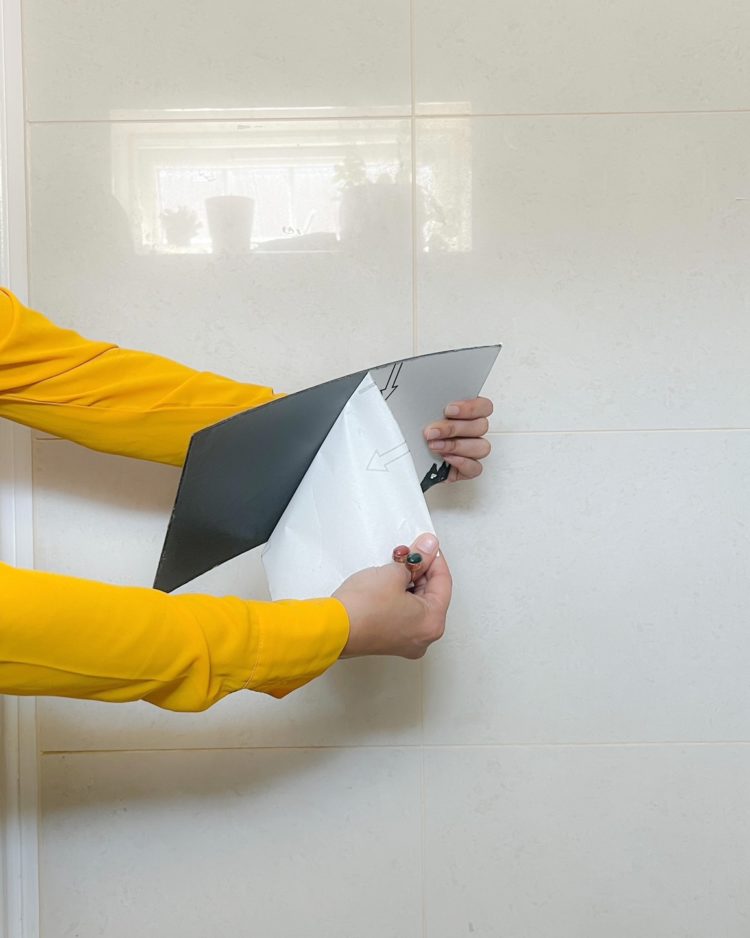
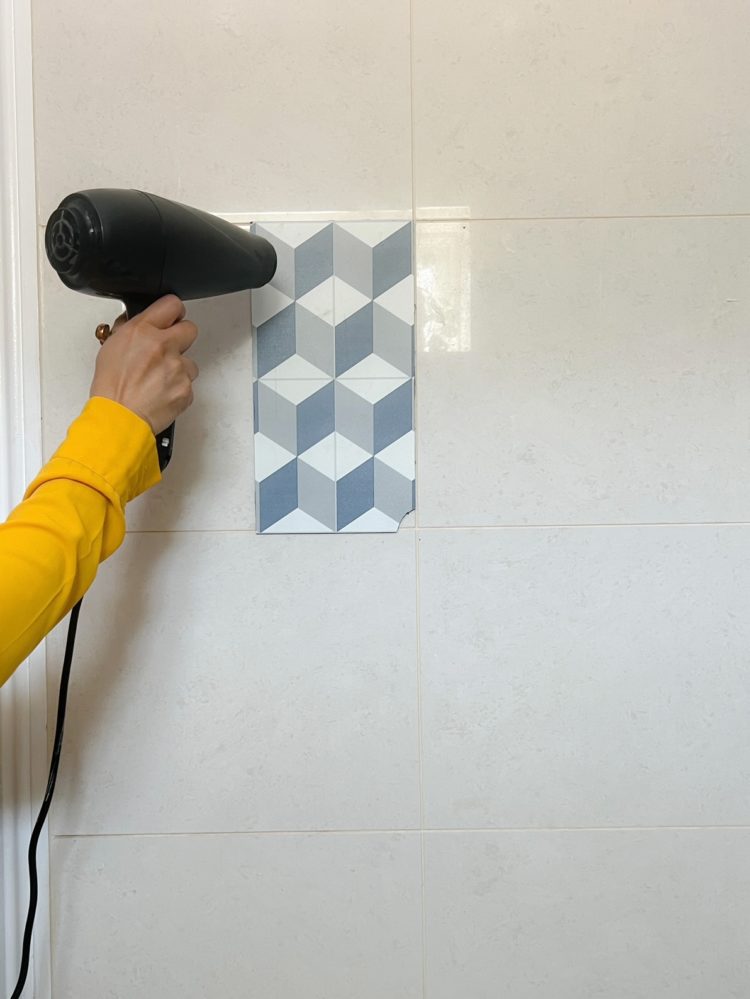
Some of you will have seen the post I wrote earlier this year when we interviewed Amara Hasham about her clever DIY rental hacks and so it made sense to go back to her to talk about the correct way to apply tile stickers. When it comes to removing them, Amara suggests using a hairdryer which will warm and then soften the glue and allow you to peel them off more easily.
But she has also used them IN her shower and with three young children this is not an area that is necessarily used carefully and with restraint. Her tip is that once you have applied the tiles you should then apply a light filling of silicon to seal them and stop water seeping through.
Now clearly water seepage is not a leak issue as you are applying them to tiles which are, presumably, already watertight, but a damp atmosphere, or drips constantly finding their way between the gaps does mean the glue will fail faster and the corners will start to peel and you may end up with an uglier mess than the tiles you were trying to hide.
A layer of silicon will prevent all this. As Amara says: “I used [these tiles] in my shower cubicle as well as on the floor and they have stayed absolutely fine even with a family of five.”
She bought hers from B&Q noting that they are water resistant and can be wiped clean. And, of course, it’s worth noting that if you want to use them to cover a kitchen splashback they won’t be under nearly as much pressure as a shower.
If your problem is not the tiles but the grout between them then I have seen several people recommend a quiet hour with a white grout pen simply drawing over the lines between the tiles. Having spent more of my life than I think worth it with a toothbrush and a bottle of bleach I’m inclined to think this is a better solution and possibly not a totally un-relaxing way to pass the time.
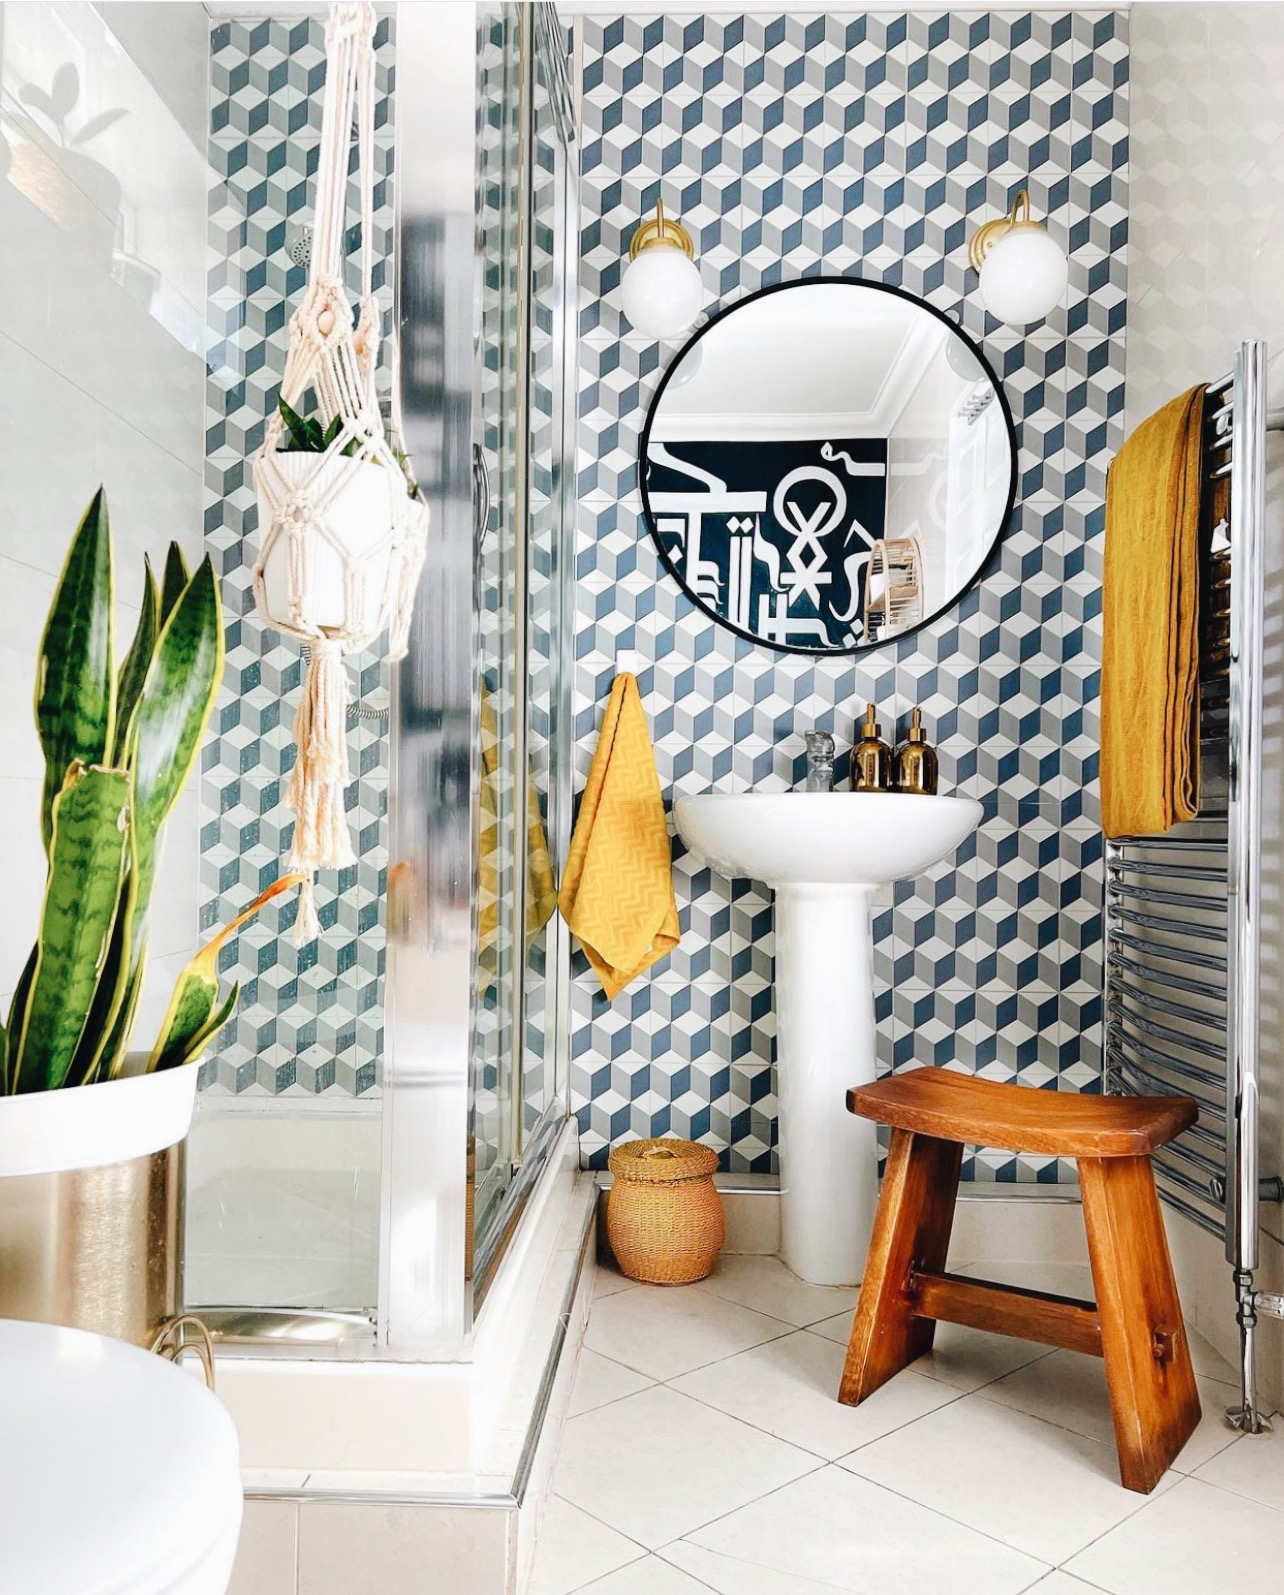
Here’s a little before and after of Amara’s bathroom.


great post – thank you
I totally swear by grout reviver, although have used Forever White grout reviver from Everbuild rather than a pen, which you can apply pretty casually and then just wipe off the excess from the tiles. Doesn’t take too long and really works so gives a lovely satisfaction payoff!